Brigadeiro
Welcome to my recipe for a super cool dessert called brigadeiro. This translates to "brigadier" in portuguese, and it has a bit of history to it... it was created in 1945 as an homage to a man named Eduardo Gomes, who was then running for the presidency of Brazil. The women of his voterbase are credited with creating these sweets to sell them at meetings and raise funds for his electorial campaign. Gomes ended up losing the election, and while he remains as a turbulent figure in brazilian history, the sweet ended up as his strongest legacy.
Nowadays, the brigadier sweets are enjoyed across the entire country, and are considered a staple of children's birthday parties. They're made from sweetened condensed milk and chocolate, and covered in chocolate sprinkles. They're commonly served in small paper cups, although a variety exists which is served on a cup and eaten with a spoon.


1st Image source: Wikipedia (public domain image;) 2nd Image source: Mayra Chiachia on Flickr
Ingredients
- 395 grams of Sweetened Condensed Milk. Preferably with high fat content, I used 8% fat.
- 200 grams of Milk Cream. Similarly you're looking for high fat, I used 15% fat in this recipe.
- 2 or 3 Table spoons of Cocoa Powder. I've used 70% cocoa, but if you're using 100% cocoa you might need to put less.
- Chocolate sprinkles
- Plastic wrap, or Saran wrap, or cling film, or whatever else you call it.
- (Optional) Candy paper cups
The measurements don't have to be super exact, I picked those mostly because they are the standard sizes of the cans these ingredients come in. This recipe yields about 30 individual brigadeiro sweets.
How to make it
The first thing you should know is that these take several hours to make. I'm serious. So buckle up, you're in for the long ride. You are going to lose as many calories as you'll gain from eating these.
Now, the first step is to take a big pot and pour all of the Sweetened Condensed Milk in there. Don't turn on the stove yet.

Dump all the Cocoa Powder, and mix it until it's a smooth mixture.
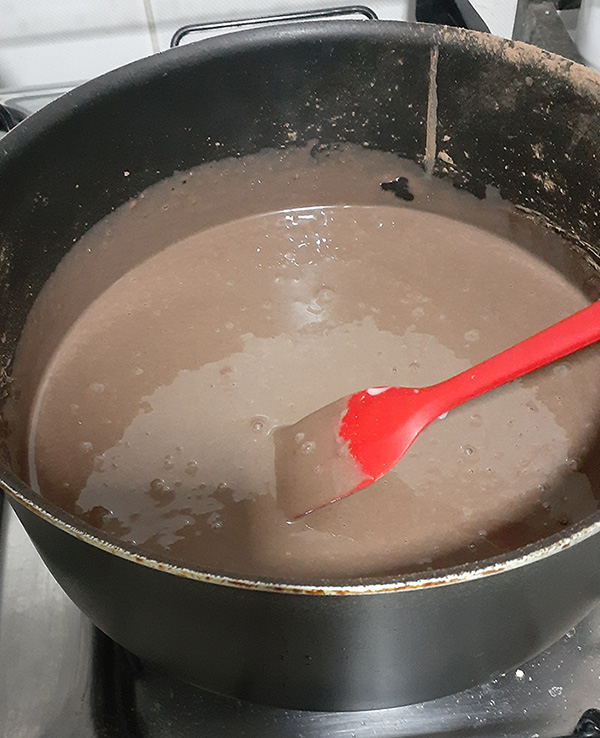
Now you're ready to add the Cream, and turn on the stove on a medium heat. You want this to heat up, and you have to mix the cream in before it gets to the boiling point so I recommend keeping the stove on a lower temperature until it's all properly mixed.
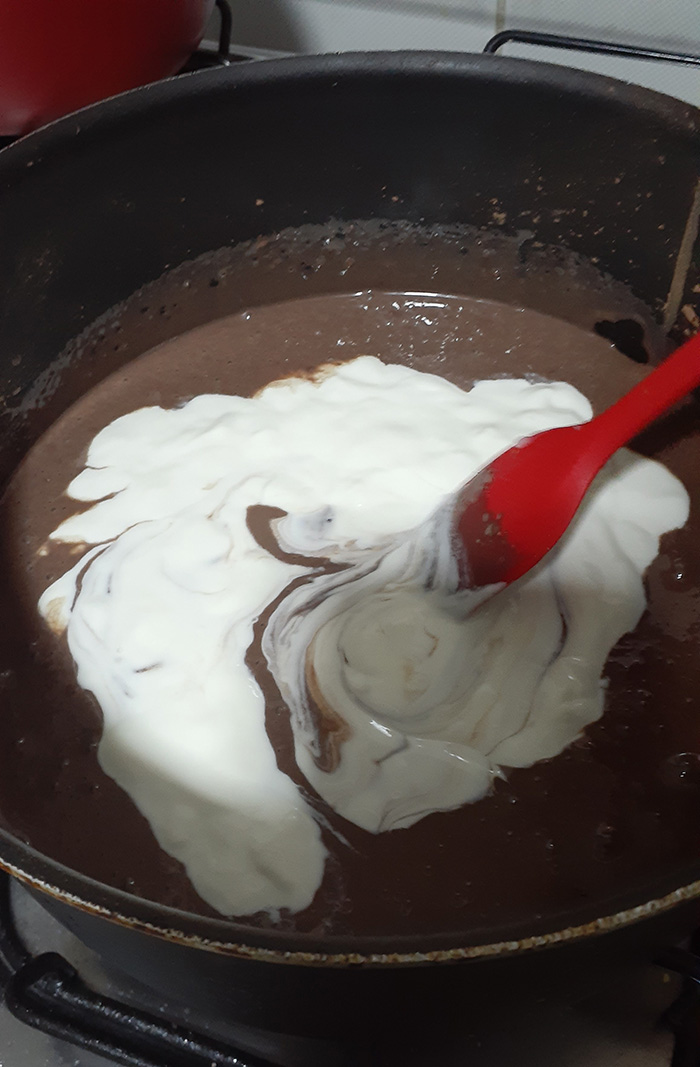
You better get comfortable because you'll be stirring this thing for a while, maybe around 30 minutes or so. After you notice that it starts to boil, turn the heat down until it's on the lowest. You will need to stir this thing until it solidifies enough. If you stop stirring you might risk it burning.
At some point you'll notice some clumps forming in the mixture and they might even be sticking to your spatula or spoon. This is normal, and you must keep going. It takes a while for the mixture to start thickening, and once it does you'll have to keep an eye on it.
You'll notice that the mixture might be thick enough for you to draw a line in it, like so:
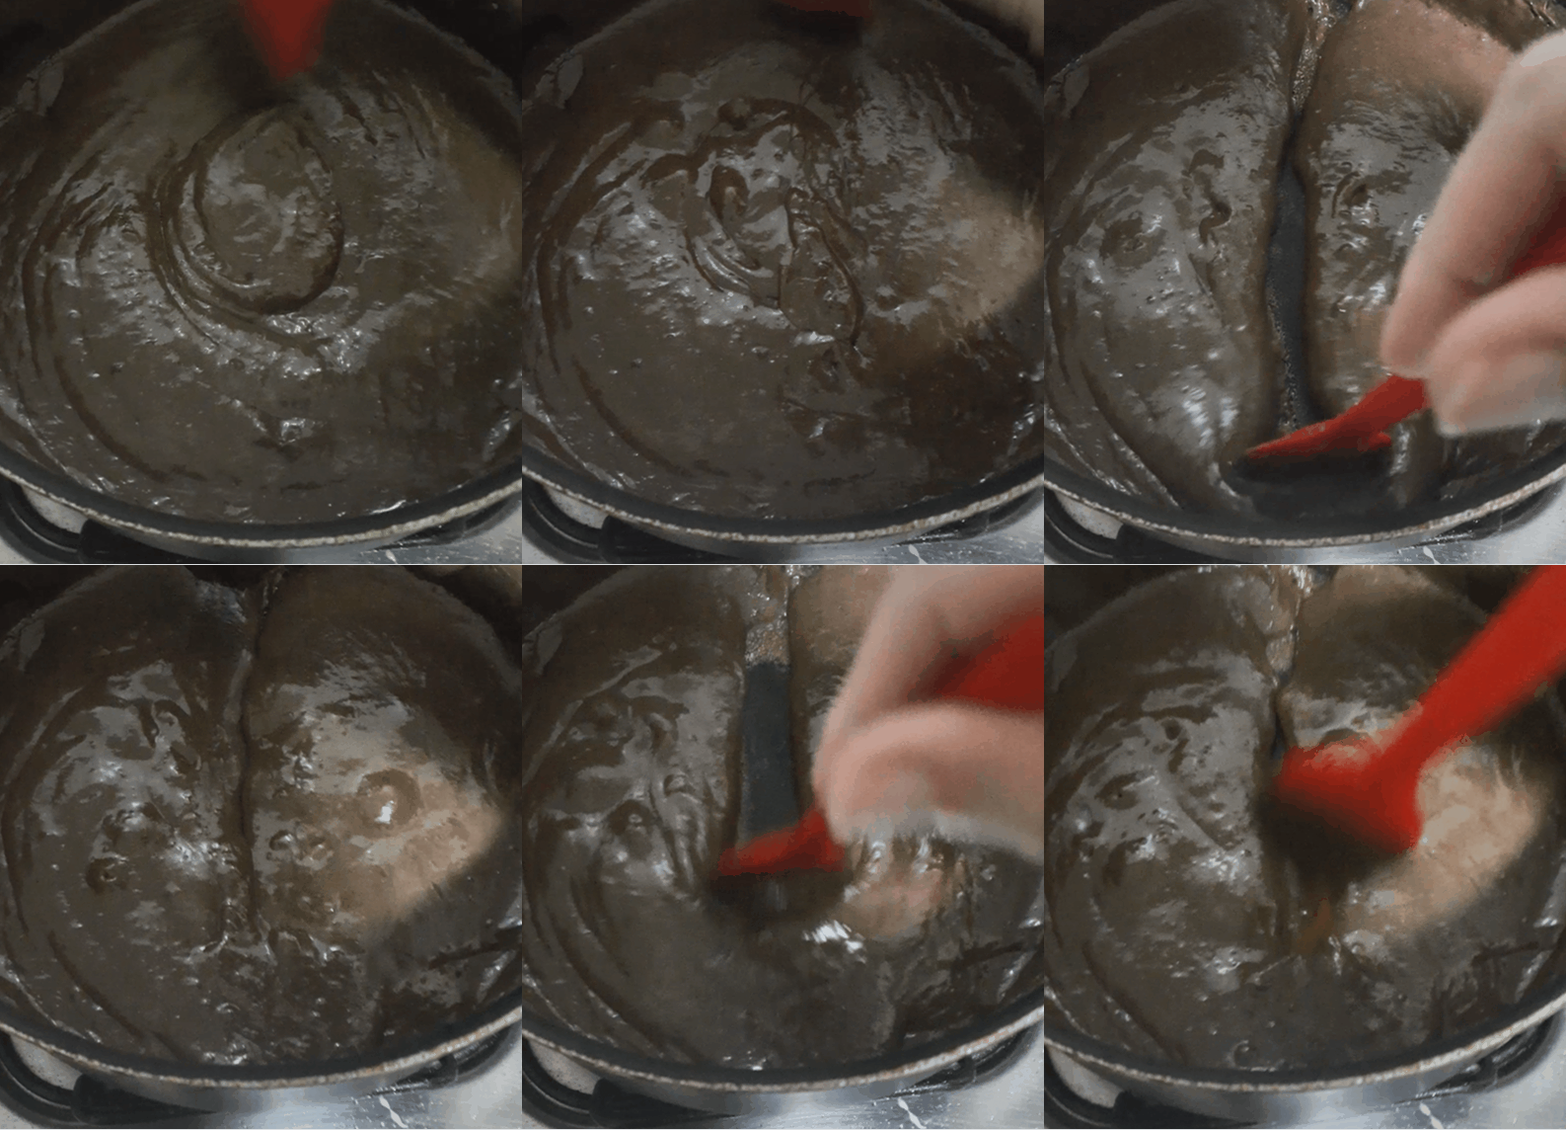
This means you're on the right track, but you still have a ways to go. What you want is for the mixture to part and then not fall back, like Moses parting the Red Sea. Once you get to that point, turn off the heat!
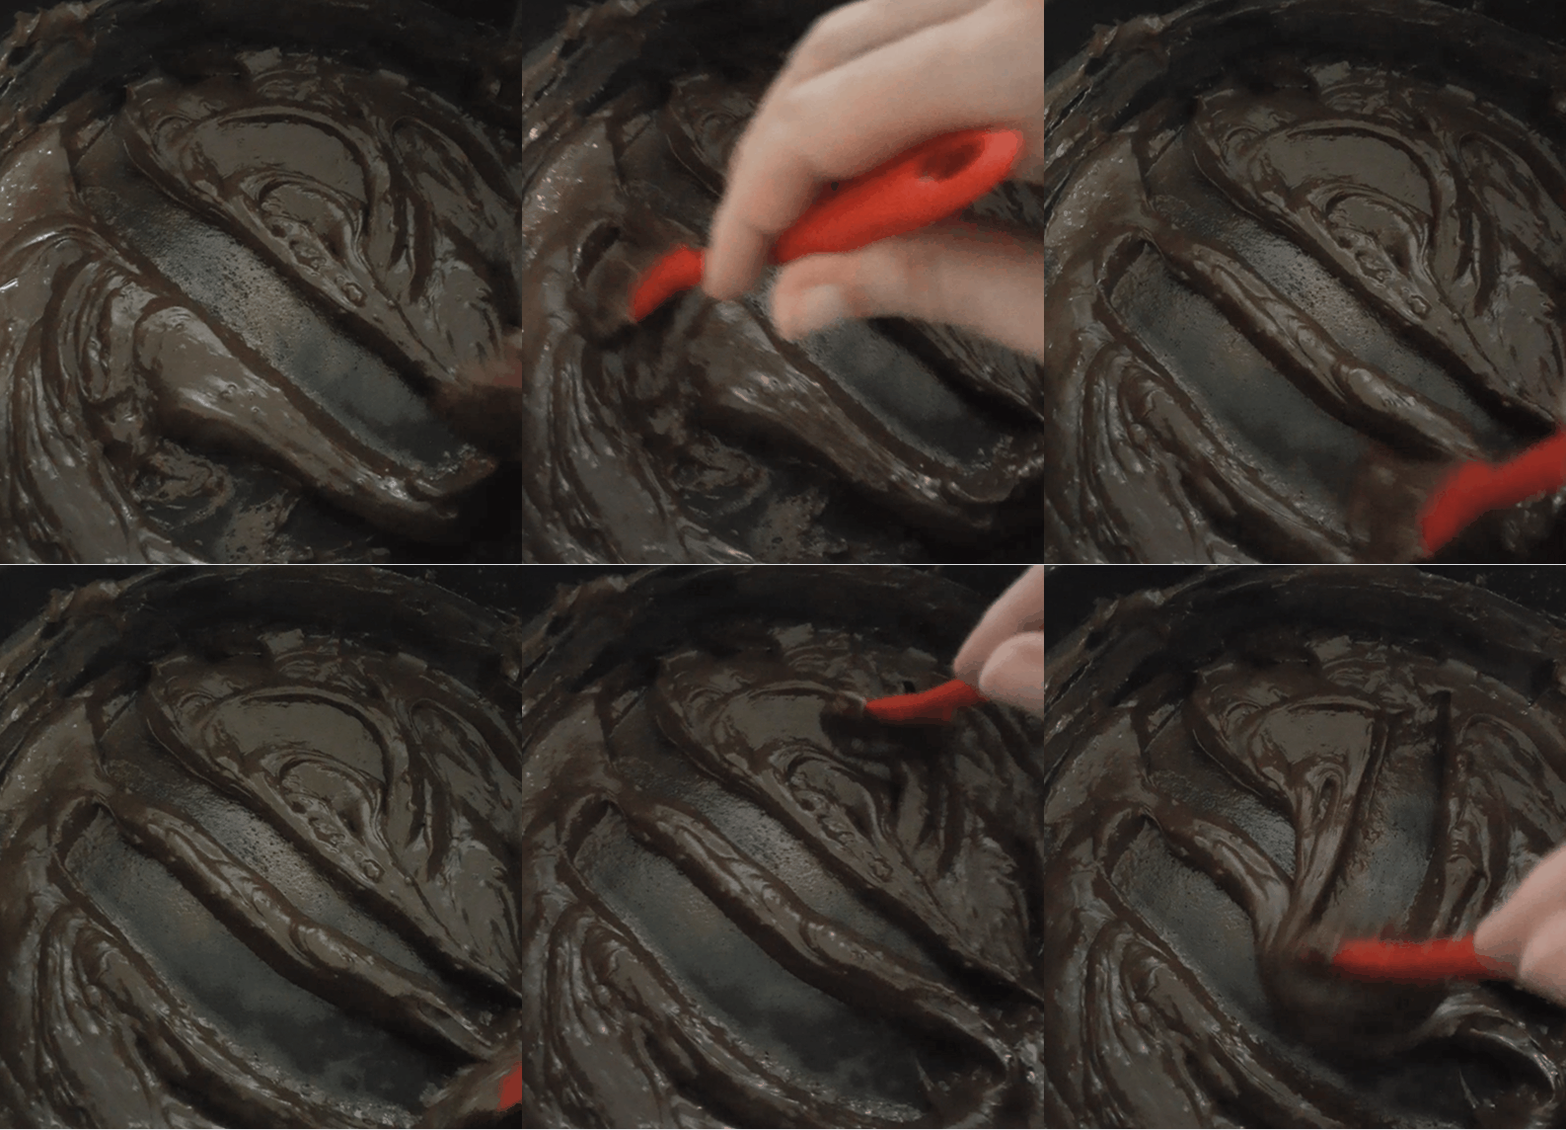
You're ready to take the mixture off the heat. Leave it alone for a bit so you can prepare the next step. You'll need to wrap this thing up with the plastic film.
Put the plastic wrap on top of a plate or something, and carefully transfer the mixture so that it is sitting on the wrap.

It's a bit hard to see but I assure you the plastic wrap is there. The mixture will probably still be incredibly hot so you'll need to be careful when wrapping it with the film. You might also need to add another layer of film, that's what I usually end up having to do.

After the mixture is fully wrapped, place it on some sort of container and put it in the fridge to cool. Leave it there for at least 6 hours. You can leave it for as many hours as you need, as long as it stays there for at least 6 hours. In this case, I ended up leaving it overnight. (You'll actually notice that the next few photos will look nicer because I took them in daylight :p)
After enough time has passed, you're ready to take the mix out of the fridge. Unwrap it, and you'll notice that it has turned into a nice little slab.
You're ready to roll the individual little brigadier sweets, and as you might have guessed, this will be another work out session. Make sure to get a nice workspace for this, here's my setup:

You'll see that I set up a container with the sprinkles in it. You'll need a lot of sprinkles so don't be afraid to fill this container as much as you need to. I had put an entire packet (about 100 grams) and it was plenty.
The measuring spoon isn't necessary but I find it quite handy when it comes to making sure each sweet will be more or less the same size.
First, get your hands wet. Okay, not exactly wet, but they can't be dry either. You can grease your hands with some butter, but personally I just lubricated my hands with plain ol' water. I dabbed a paper towel on my hands to get the excess water out, since wet hands will make it harder for you to roll a ball.
Scoop out a bit of the slab, and place it on your palm.

You'll need to roll the "dough" into a ball. Roll it around in between the palms of both your hands. Don't press down too much on it, or else the ball will end up a little flat. This can take some practice to get it right. You can also try to shape it a little with your fingers before rolling it on your palms.
There really isn't a way for me to explain it via text, you'll need to feel it for yourself. You might have some trouble at first if your hands are still too wet, you'll notice that the ball will slide around a lot; but if your hands are too dry, the ball will stick to it. Find a nice middle ground.
Once you're satisfied with the shape of your ball, drop it on the bed of sprinkles you've set. Roll it around on it until the ball is completely covered in sprinkles.

Your hands will get messy during this, there's no way around it. Wear gloves if you find it more comfortable, it has no effect of the final product.
Now that the brigadeiro sweet is finished, place it in the paper cup for the final touch! You'll have to repeat this process for every individual sweet, until you run out of Slab.

The final yield of my efforts. I didn't count how many there were, but it should be about 30. I didn't make these for a party of anything, and if you're just making these to eat at home then you don't really need the paper cups. But, I think it makes it easier for people to grab them and eat, since they can just grab it by the cup and won't have to touch the candy itself.
Anyway, I don't have any closing words this time other than: this shit rocks. If you've gone all the way to make these, tell me what you thought of it! My email is deimosphoibus[at]gmail.com. Maybe I'll put the testimonials at the end of this page or something.